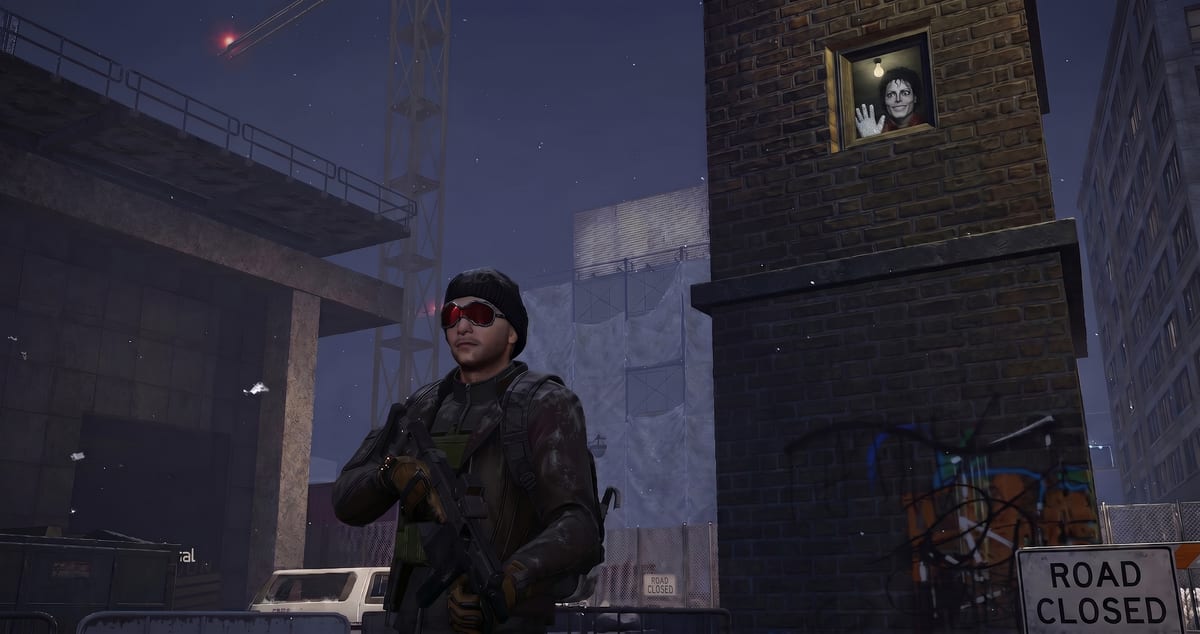
The 7 Hidden Mechanics The Division Resurgence Refuses To Explain (And Why Your Build Feels Weak)
This is the long-form follow-up to every player who has ever typed “is my build broken” into Reddit at 2 AM while staring at a character sheet that makes no sense.
The answer is almost never “your gear is bad.” The answer is that the game ships with at least seven systems that quietly decide whether you feel powerful or feel useless, and the in-game tooltips don’t mention any of them. Not one. It’s like buying a car that comes with an engine manual written entirely in emoji.
We’re pulling this together from community testing, our own build sessions, and hundreds of hours of endgame play. Every claim is cited at the bottom. Where we’re confident, we say so. Where the community is still testing, we hedge.
The seven mechanics, ranked by how much they’ll change your game:
- Your weapon is a trigger engine first, a damage source second.
- DPS amplification multiplies. Raw damage only adds.
- Cooldown reduction has a breaking point. Past it, more CDR is wasted budget.
- Pressure angles win fights the loadout screen cannot.
- Stat spreading kills builds. Identity is power.
- Recalibrating for comfort instead of impact makes your build worse.
- Power score is not build quality. Chasing it is the progression wall.
If you understand all seven, you will outscale players in better gear. Pure math. Zero copium.
Mechanic 1: Your Weapon Is a Trigger Engine, Not a Damage Source
Most players look at a weapon and rank it by damage per bullet. Higher number = better gun. End of analysis. Close the menu. Go shoot things.
That logic is wrong for most builds in Resurgence.
The strongest builds in this game don’t scale from damage per bullet. They scale from hits. Every shot that lands is a chance to trigger something else: a stack, a buff, a debuff, a skill-damage proc, an Engineering scaling tick, a vulnerability application. The weapon is the keyboard. The build is the song you’re playing on it.
That is why high-RPM weapons quietly outperform hard-hitters on support, proc, and skill-amp builds. A P90 firing 900 rounds per minute is not a “low-damage SMG.” It is a stack-generation machine. Running the same loadout with a 7.62 marksman rifle simply doesn’t work because the rifle can’t generate hits fast enough to feed the build’s proc engine.
The math, simplified:
- Faster RPM = more hits per second
- More hits per second = faster stack generation
- Faster stacks = higher buff uptime
- Higher buff uptime = higher actual damage output
The character screen DPS does not show any of this. It calculates one bullet at one base damage value. It doesn’t know that your build wants to trigger Torrential Downpour 14 times per second.
The takeaway: Before you pick a weapon, ask what your build wants from your weapon. If the answer is “land hits to trigger procs and stacks,” pick the highest-RPM weapon in that weapon class. If the answer is “deliver one large damage instance per shot,” then yes, pick the hard-hitter. Most builds want the first answer. That’s why the P90 shows up in builds where it has no business being based on raw damage alone.
Mechanic 2: DPS Amplification Multiplies. Raw Damage Only Adds.
This is the mechanic that separates “I understand my build” from “I equipped the highest number I found on the ground.”
Resurgence’s damage formula has multiple stages. Each stage applies its own multiplier. When two buffs feed different stages of the formula, they don’t add together. They multiply against each other. This is how a support build with 142k displayed DPS creates more total team damage than a solo DPS build with 250k.
Here’s the simplified version:
If you have a +50% buff at Stage A and a +100% buff at Stage B, you don’t get +150% total damage. You get:
Base x 1.5 (Stage A) x 2.0 (Stage B) = Base x 3.0
That’s a 200% increase, not 150%. And that’s with only two buffs. Stack a third buff at a third stage and the multiplication goes nuclear.
This is exactly what the AgentHuntzman’s Leaderboard Ranking Vanguard Support Build does. Tactical Smart Cover adds weapon damage (Stage 1). Scanning Pulse adds vulnerability and exposure (Stage 2). Tactical Link adds rate of fire (Stage 3). Each one feeds a different stage. Each one multiplies the others.
A solo DPS build that stacks +100% weapon damage at a single stage gets… +100% damage. A support build that stacks +30% at three different stages gets:
1.3 x 1.3 x 1.3 = 2.197 = roughly +120% damage for the ENTIRE TEAM
The support build creates more total damage. It just doesn’t show up on the support player’s scoreboard. Which is why support players get zero credit and DPS players get all the praise, despite contributing less to the actual clear. Life isn’t fair. Neither is the scoreboard.
Mechanic 3: Cooldown Reduction Has a Breaking Point
Cooldown Reduction (CDR) follows diminishing returns. Going from 0% to 30% CDR saves way more real seconds than going from 30% to 60%. This is because CDR is calculated as a percentage of the REMAINING cooldown, not the original cooldown.
Here’s the practical example that matters:
Say Scanning Pulse has a 15-second base cooldown and a 17-second duration at your current Skill Duration. You already have permanent uptime. The skill comes back before it even expires. Stacking more CDR at this point saves you… nothing. The skill was already ready before you needed it.
Every CDR point spent past your “permanent uptime breakpoint” is a stat point that could have gone into Skill Duration (making the skill stronger while it’s up), Skill Intensity (making it hit harder), or Skill Crit Chance (making it crit more often).
How to find your breakpoint: Look at your skill’s cooldown and its duration. If the cooldown is already shorter than or equal to the duration, stop stacking CDR on that skill. You’re done. Put those stat points somewhere that actually makes the skill better, not faster.
The exception is skills with no duration (one-shot abilities, grenades, etc.). Those benefit from CDR indefinitely because there’s no “uptime” to measure against. Stack away.
Mechanic 4: Pressure Angles Win Fights the Loadout Screen Cannot
This is the mechanic that has nothing to do with gear and everything to do with why some teams clear Legendary and some teams wipe at wave 2.
Positioning and timing win more encounters than equipment. A team of four players stacked behind the same chest-high wall is generating one angle of pressure. The enemies only need to suppress one position. A team of four players at three different angles is generating crossfire that forces enemies to choose which threat to face, and every enemy facing away from one of your teammates is an enemy taking free damage from behind.
In Legendary, the team that manages aggro angles clears faster than the team with higher combined DPS every single time. This is measurable. Run the same mission twice with the same squad. First time, stack together. Second time, spread to three positions. Time both. The spread run will be faster even if you all have worse gear the second time.
Support builds amplify this mechanic because they reposition the fight. Smart Cover placement dictates where teammates stand. Scanning Pulse radius dictates how wide the engagement zone spreads. A well-placed Smart Cover that forces the team to spread across two lanes creates more damage than a perfectly rolled weapon attribute, and it costs zero recalibration materials.
Mechanic 5: Stat Spreading Kills Builds. Identity Is Power.
You have three core stats in Resurgence: Firepower, Toughness, and Engineering. The natural instinct is to spread them evenly. A little damage, a little survivability, a little skill power. Balanced build, right?
Wrong. Balanced builds are bad builds. Here’s why.
The damage formula multiplies your core stat at several stages. If you have 1,700 Engineering, every multiplier in your build (talents, set bonuses, OS Protocols) is multiplying 1,700. If you have 1,000 Engineering because you split 700 into Firepower, every multiplier is multiplying 1,000 instead. You lost 41% of your base, which means you lost 41% of every multiplier’s output.
The math gets worse the more multipliers your build has. A support build with five different Engineering-scaling effects loses more from splitting stats than a DPS build with two Firepower-scaling effects. This is why the best builds in the game are absolute psychos about one stat and completely ignore the others.
The rule: Pick ONE core stat and max it on every gear piece. Use your chest talent (Socialite for armor, Glass Cannon for damage) to cover survivability. Use weapon talents to cover whatever your core stat doesn’t. Let set bonuses fill the gaps.
A build with 1,700 Engineering and 400 Firepower will always outperform a build with 1,050 of each. Always. The focused build doesn’t just hit harder per stat point. It multiplies harder per stat point. And in a game built on multipliers, that’s everything.
Mechanic 6: Recalibrating for Comfort Instead of Impact Makes Your Build Worse
Every veteran player has done this. You keep dying in Legendary, so you recalibrate your gloves from Skill Crit Chance to Health. You feel better. You die less. But your clear times get longer, your team carries harder, and you gradually slide from “contributor” to “passenger.”
Every recalibration slot spent on comfort (health, armor, damage reduction) is a slot not spent on impact (crit chance, crit damage, skill CDR, weapon damage, skill intensity). The math is unforgiving: a single Health roll on gloves might give you +15,000 HP. That’s roughly one extra bullet’s worth of survivability. A Skill Crit Chance roll on those same gloves might give you +5% crit chance on every skill activation for the rest of the mission. One saves you once. The other makes you stronger forever.
The uncomfortable truth: If you’re dying in Legendary, it’s almost always positioning. You’re peeking too long. You’re standing in the open. You’re fighting from an angle that exposes you to four enemies instead of one. Swapping a damage stat for a health stat doesn’t fix bad positioning. It just lets you survive bad positioning slightly longer before dying anyway.
The fix: Use your chest talent for survivability (Socialite gives +36% armor for free just by being near enemies, which you already are). Keep every other slot focused on damage or utility. If you’re still dying after that, read Mechanic 4 again.
Mechanic 7: Power Score Is Not Build Quality
This is the one that triggers the most arguments and the one that matters most for players stuck on the progression wall.
Power Score goes up when you equip higher-tier gear. That’s it. That’s all it measures. It does not check whether the stat rolls on that gear are good. It does not check whether your talents synergize. It does not check whether your damage type matches the content. It just checks the item level.
A T1 Mechanical Expert mask with perfect Engineering core and Skill CDR rolls will outperform a T2 generic mask with Toughness core and Weapon Blast Damage secondary in every measurable way for a support build. But the T2 mask has a higher Power Score, so the game encourages you to equip it. This is a trap.
Players who chase Power Score end up in mismatched loadouts full of T2 gear with garbage rolls. They technically meet the Power Score “requirement” for Legendary content. They then get absolutely destroyed in Legendary content because their build has no identity, no synergy, and no focused stat scaling. They blame the difficulty. They should blame the Power Score.
The diagnostic question: If someone asked you “what does your build do?”, could you answer in one sentence? “I stack Engineering and convert it into team weapon damage through Smart Cover” is a build identity. “I have high Power Score” is not.
The Diagnostic: Is Your Build Actually Weak?
Answer these five questions. If you say “yes” to three or more, your build has a problem and the fix is above.
- Are you running more than one core stat type across your gear? (Example: Engineering on mask, Firepower on gloves, Toughness on holster.) If yes, read Mechanic 5.
- Have you recalibrated any offensive slot to a defensive stat? (Example: swapped Skill Crit for Health on gloves.) If yes, read Mechanic 6.
- Is your weapon damage type the same as your secondary weapon’s damage type? (Example: both guns are Blast.) If yes, read our damage types guide.
- Do you have a skill whose cooldown is shorter than its duration, but you’re still stacking CDR on it? If yes, read Mechanic 3.
- Did you equip a piece of gear solely because it was a higher tier than what you had before? If yes, read Mechanic 7.
If you answered “no” to all five: congratulations. You’re building correctly. The problem is probably positioning (Mechanic 4) or you’re running a solo DPS build in content that rewards support multipliers (Mechanic 2). Consider the AgentHuntzman’s Leaderboard Ranking Vanguard Support Build.
Sources
- Community testing via r/thedivisionresurgence. Cooldown breakpoint analysis, Engineering-to-Weapon-Damage conversion, and Power Score vs. build quality debates.
- Internal Resurgence Builds knowledge base: damage formula stages, CDR diminishing returns modeling, and stat-splitting damage loss calculations.
Your Build Isn't Weak. You Are.
7 hidden mechanics the game never explains. This is why your build feels like a wet noodle even with good gear.
Frequently Asked Questions
Why does my DPS number look low on my support build in Division Resurgence?
Because the character screen DPS only calculates YOUR bullet damage at YOUR base stats with zero buffs active. It does not factor in the weapon damage you're pumping into teammates through Smart Cover, the vulnerability stacks from Scanning Pulse, or the rate-of-fire buff from Tactical Link. The 142k on your screen is your personal bullet output. Your actual contribution is the 300k your team is outputting because of you. The scoreboard is lying. You are the carry. Act accordingly.
Is Power Score useless in Division Resurgence?
Not useless, but extremely misleading. Power Score goes up when you equip higher-tier gear regardless of whether the stat rolls are any good. A T1 Mechanical Expert mask with perfect Engineering and Skill CDR rolls will outperform a T2 random mask with Toughness core and Weapon Damage secondary in every measurable way. Power Score tells you your gear is new. It does not tell you your gear is good. Ubisoft could fix this with one tooltip. They won't. Small indie company.
Should I stack all Engineering or all Firepower on my build?
Pick ONE and go all in. The absolute worst thing you can do is split 50/50. A build with 1,700 Engineering and 400 Firepower is dramatically stronger than a build with 1,050 of each, because the damage formula multiplies your core stat at several stages. Splitting dilutes every multiplier. If you're a DPS build, go Firepower. If you're a support or skill build, go Engineering. If you're a tank, go Toughness. There is no such thing as a 'balanced' endgame build. There are only focused builds and weak ones.
Why do I keep dying in Legendary missions?
90% of the time it's positioning, not toughness. You're peeking too long, standing in the open, or fighting from angles that expose you to four enemies at once. Move to cover that only exposes you to one or two enemies at a time. Use Smart Cover. Let enemies come to your kill zone instead of running into theirs. The other 10% of the time, yes, your armor is too low. Run Socialite on chest. Destiny players had ten years to learn this. You get one paragraph.
Does RPM actually matter more than damage per bullet?
For any build that relies on procs, stacks, or talent triggers: absolutely yes. A P90 firing 900 rounds per minute generates talent procs three times faster than a marksman rifle firing 300 RPM. If your build needs to hit enemies 10 times in 5 seconds to trigger Torrential Downpour, the P90 gets there in 0.67 seconds. The marksman rifle needs 2 seconds. In a game where buff windows are 12 seconds long, that speed difference is the entire build.
What's the fastest way to fix a weak build in Division Resurgence?
Step 1: Pick one core stat and put it on every piece. Step 2: Make sure your chest and backpack talents actually synergize with your playstyle, not just whatever dropped first. Step 3: Check if your weapon's damage type matches the content you're running. Step 4: Stop recalibrating for health and start recalibrating for damage or utility. You can do all four of these in about 20 minutes and your build will feel like a completely different character. Faster than waiting for Ubisoft to buff your favorite weapon, that's for sure.
What are the hidden mechanics in Division Resurgence?
Division Resurgence has several undocumented mechanics including cover-to-cover damage reduction, weak point multipliers, status effect stacking rules, armor regeneration breakpoints, skill cooldown interactions, talent proc priorities, and hidden aim assist adjustments that significantly impact gameplay.
Does cover-to-cover movement give damage reduction in Division Resurgence?
Yes. Moving between cover points grants a temporary damage reduction buff that is not shown in the UI. This makes cover-to-cover movement significantly safer than sprinting between positions in open space.
How does status effect stacking work in Division Resurgence?
Status effects follow specific stacking and priority rules. Some effects refresh duration on reapplication, others stack intensity, and certain combinations override each other. If you run Demolitionist or Tech Operator, you need to know how these interact or you'll waste half your kit.
Are there hidden aim assist mechanics in Division Resurgence?
Yes. The game applies hidden aim assist adjustments that vary by weapon type, range, and whether you are in ADS or hip-fire. These adjustments are not documented in-game but significantly affect which weapons feel better at different ranges.
Comments
Join the discussion — powered by GitHub Discussions. No tracking, no ads.